Category: A New View of Healthy Eating

  • A New View of Healthy Eating: Daily Healthy Recipes by Melanie Albert: 4 Great Ways to Cook 20 Pounds of Organic Tomatoes: Part 1: Dehydrate Tomatoes

    by Melanie A. Albert, intuitive cooking expert, author, speaker, Founder & CEO Experience Nutrition Group, LLC

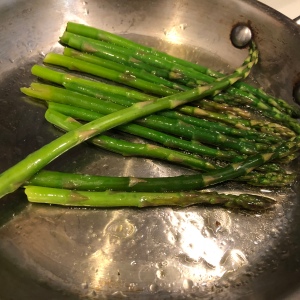
    Several times a year I have the great opportunity to purchase a flat – 20 pounds – of organic Campari tomatoes from McClendon Select Farms in Phoenix. This week I shared a few pounds of the tomatoes in a Wise Choices Meet-up with the Valley of the Sun United Way. After that I started creating a few different batches of tomatoes with the other beautiful produce from this week’s Uptown Farmers Market.

    A-tomatoes-box-IMG_2786

    4 Different Ways to Cook Tomatoes

    I invite you to use these 4 ways to cook the tomatoes as a guide to cook tomatoes from your local farmers’ markets. During the next few days I’ll be blogging the cooking process with photos and videos for all of these ways to cook tomatoes.

    • Roasted Tomatoes. Orange Carrots. Red Peppers. Green Onions.
    • Stove Top Tomato Sauté. Arizona Lemons.
    • Dehydrated Tomatoes.
    • Roasted Tomatoes. Leeks. Green Garlic.
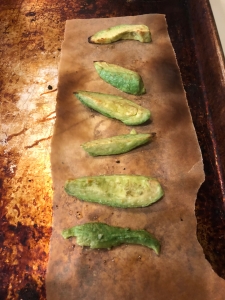
    AA-tomates-4ways-JVRJ3960

    Dehydrated Tomatoes

    Dehydrating tomatoes is a really simple way to prepare tomatoes. When we dehydrate, the flavor of the tomatoes becomes very concentrated and sweet.

    Simple Steps

    • Slice tomatoes in rounds: half or in thirds.
    • Place on dehydrator screens, with skin side down.

    A-02-DehydrateTomatoe-IMG_2968

    • Dehydrate at 115 degrees for about 10-12 hours. Enjoy the tomato aromatherapy while dehydrating.

    A-04-TomatoesDehydrate-Ready-screen-IMG_3021

    • Store in air-tight glass jars.

    A-07-DehydratedTomatoes-jars-IMG_3133

    The dehydrated tomatoes were so delicious,  I  sliced a few more pounds, which are in the dehydrator right now.

    5 Great Ways to Enjoy Dehydrated Tomatoes

    1. Enjoy as a snack.
    2. Add to a veggie sauté.
    3. Use as a pizza or flatbread topping.
    4. Process in a raw marinara sauce for a deep flavor.
    5. Add to a nut pate for a fresh taste.

    Stay in touch, as I’ll be sharing the other four ways to cook 20 pound of tomatoes. If you dehydrate tomatoes, please share your experience with us on Facebook: www.facebook.com/NewViewHealthyEating

    For some additional ideas to cook tomatoes, Melanie’s book, “A New View of Healthy Eating” is available.

    56-57_Tomato-sauce-1

    A-IMG_5209


  • A New View of Healthy Eating: Daily Healthy Recipes by Melanie Albert: Arizona Winter Brown Rice Pilaf

    by Melanie A. Albert, intuitive cooking expert, author, speaker, Founder & CEO Experience Nutrition Group, LLC

    This month has been very full with incredible cooking events with Visit Phoenix, Valley of the Sun United Way, and Gregory’s Fresh Market, so today I decided to enjoy  a “day of rest.” With a quiet day, I wanted to cook something that would be really quick and easy to prepare and oddly, I was inspired by simple organic brown rice.

    Arizona Winter Rice Pilaf

    With our Winter Arizona growing season, a few favorites in my refrigerator from Wednesday’s Uptown Farmers’ Market: green garlic, red peppers, beautiful carrots from Steadfast Farm, and fresh arugula from McClendon Select. Plus, I almost always have previously made frozen veggie stock and was happy to still have Hatun Basil Olive oil in my pantry. With these ingredients I created a very simple rice pilaf. You can use this recipe as a guide to cook your own version of pilaf with your favorite veggies and scroll down for the simple steps from my cookbook, “A New View of Healthy Eating.”

    SIMPLE INGREDIENTS

    • 1 cup brown rice
    • 2 cups veggie stock
    • 2 tbsp basil olive oil
    • 1 green garlic
    • 1 red pepper
    • Handful orange carrots
    • Handful arugula
    • Few pecans

    A-01-BrownRicePilafIMG_2793

    A-03-BrownRicePilaf-IMG_2797

    SIMPLE STEPS

    • Heat saute pan on low.
    • Add olive oil to pan.
    • Gently sweat green garlic for about a minute.
    • Add red pepper and saute for a few minutes.
    • Add carrots and saute for a few minutes.
    • Pour dry brown rice into the pan. Stir to coat with olive oil.
    • Add veggie stock. Stir.

    b-06-brownricepilaf-img_2831.jpg

    • Cover and cook for about 20 minutes. (Quick video peek.)


    B-07-BrownRicePilaf-IMG_2844

    • Toss arugula on top of the cooked pilaf. Cover pan. Cook for about a minute.

    B-09-BrownRicePilaf-IMG_2861

    • Pause and enjoy the beauty of the dish.

    D-03-BrownRicePilaf-IMG_2877

    • Plate with pecans.

    f-brownricepilaf-plate-top-img_2889.jpg

    • Mindfully enjoy your meal.

    E-BrownRicePilaf-IMG_2891

    EXCERPT from “A New View of Healthy Eating”

    How to Make Rice Pilaf for a Dinner Side Dish

    Pilaf is one of the main methods of cooking rice and is popular in Indian, Mexican, and Middle Eastern cuisines. The pilaf method is similar to steaming; however, in the pilaf method, whole grains are first sautéed, often with aromatics (like onions or shallots) before liquid is added, creating a lot of flavor. Pilafs also include extras such as vegetables and toasted nuts or seeds.

    Simple Steps to Cook Using the Pilaf Method

    1. In a sauté pan over low heat, cook mirepoix (carrots, onions, and celery or just onions) in a fat, such as olive oil. Cook on low heat when you do not want to add color to your dish. For more color, cook at a higher temperature.
    2. Add grains to the pan and stir to lightly coat each grain with the fat. Do not rinse grains before cooking.
    3. Toast grains by cooking a little more.
    4. Add a flavorful liquid, such as vegetable stock.
    5. Stir to make sure grain is not sticking to the bottom of the pan.
    6. Similar to the whole grains steaming method, bring to boil, cover tightly, and reduce heat to the lowest setting (or cook in oven).
    7. Cook a little longer than the time indicated for your grain and until all liquid is absorbed into the grains.
    8. Rest grain for 10-20 minutes.
    9. Fluff.
    10. Rest for 10 minutes.
    11. Serve.

    118-119_rice-pilaf-dinner_24Juy

    Enhance Your Pilaf

    To enhance the flavor and texture in your pilaf, add spices, herbs, fresh vegetables, nuts, and seeds.

    • After the grains are coated in fat, add dried spices for extra flavor. Try Middle Eastern spices like star anise, cinnamon, and cumin. For a Mexican pilaf, add chili powder, cumin, cinnamon, and coriander seeds.
    • After the cooked grains have rested, add your favorite cooked veggies, fresh herbs, or toasted nuts and seeds to create a meal.

    Hope you enjoy cooking a simple brown rice pilaf and share your photos with us on Facebook: www.facebook.com/NewViewHealthyEating

    Interested in Melanie’s cookbook, “A New View of Healthy Eating“? Buy it now!

  • New View of Healthy Eating: Daily Healthy Recipes by Melanie Albert: My New Favorite Green: Chrysanthemum Green Saute

    by Melanie A. Albert, intuitive cooking expert, author, speaker, Founder & CEO Experience Nutrition Group, LLC

    This week I’ve been enjoying chrysanthemum greens, a sweet floral green, typically cooked in Asian cuisine.  One of our local farms, The Farm at South Mountain, about a half mile from my home is growing chrysanthemum greens this season. We had the great opportunity to enjoy it massaged in a raw kale salad in our Team Building Cooking Challenge with Visit Phoenix. After enjoying chrysantemum greens in the salads, I decided to experiment with them in a quick saute. Check out the recipe in today’s blog. It’s incredible!

    A-02-VisitPhoenix-ExperienceNutrition-TeamBuild-kale-IMG_2088
    PHOTO CREDIT: Cassie Hepler @cassiescouture
    A-05--VisitPhoenixExperienceNutrition-TeamBuilding-KaleSalads-IMG_2103
    PHOTO CREDIT: Cassie Hepler @cassiescouture


    After enjoying the chrysanthemum greens so much in the kale salads, I very intuitively sauted the greens with campari tomatoes from McClendon Select and beautiful sweet carrots grown by Steadfast Farm in our area. The saute is so sweet with floral aromatic I’m loving it so much I’ve cooked it three times in the last two days.

    Hope you enjoy this recipe as much as I do.


    Chrysanthemum Greens Saute

    Simple Ingredients

    • 2 tbsp organic extra virgin olive oil
    • Handful tomatoes
    • Handful chrysanthemum greens
    • Handful mini-carrots, sliced
    • Avocado, sliced.
    • Dash sea salt

    Simple Steps

    • Heat saute pan on medium.
    • Add olive oil to pan.
    • Once heated add tomatoes, stir, and saute for a few minutes.
    • Add dash of sea salt.
    • Add carrots, and saute until slightly soft.


    • Add chrysanthemum greens and saute about a minute.


    • Add sliced avocado to warm in pan.

    A-10-crysanthemum-IMG_2692

    A-12-crysanthemum-IMG_2758Join us on Facebook with your favorite greens creations. www.facebook.com/NewViewHealthyEating

    Interested in additional simple culinary techniques, check out Melanie’s book, “A New View of Healthy Eating”

    A-11-crysanthemum-IMG_2714

  • A New View of Healthy Eating: Daily Healthy Recipes by Melanie Albert: Roasted Carrot Soup

    by Melanie A. Albert, intuitive cooking expert, author, speaker, Founder & CEO Experience Nutrition Group, LLC

    I love beautiful food, simple plant-based cooking, and continually learning plant-based culinary. Since my birthday in November 2017, I’ve been enrolled in the Plantlab Culinary Cooking Fundamentals Course. Although I’ve been teaching Whole Foods Cooking at the Southwest Institute of Healing Arts since March 2015, have led hundreds of cooking workshops and classes, and completed the Rouxbe Professional Plant-based Course in January 2015, I always love to learn more culinary.

    For the Final Project in the Plantlab Culinary Course, my First course is Roasted Carrot Soup. Orange Braised Leeks.  This course was inspired by local Arizona farmers’ carrots and our Winter Arizona citrus season. Today, I’m happy to share with you the recipe some photos of the Roasted Carrot Soup.

    A-soup-finalplate-side-IMG_1625

    Roasted Carrot Soup. Orange Braised Leeks.

    A light, fresh soup showcasing local  Arizona farmers’ carrots and leeks. Thanks so much to Steadfast Farm for the beautiful carrots. Love their delicate beauty and how their flavor tastes like  the real carrots  I enjoyed as a kid. And, thanks to McClendon Select for the leeks. In the past I would order a dish with leeks at restaurants, now I’m enjoying braised leeks with carrot soup and roasted leeks on flatbread.

    INGREDIENTS


    • 2 pounds local Arizona farmers yellow and orange carrots
    • 2-3 tbsp organic extra virgin olive oil
    • Dash sea salt
    • 1 shallot, sliced
    • 1 tsp organic extra virgin olive oil
    • 1 tsp coriander seeds
    • 1 tsp caraway seeds
    • ¼ tsp sumac (love this lemon flavor)
    • 2 quarts veggie stock
    • ½ tbsp sea salt
    • 1 Bouquet
      • 2 bay leaves
      • 1 bunch lemon verbena
      • ¼ bunch parsley
      • ½ Arizona navel orange, sliced
    • 2 tbsp fresh squeezed orange juice
    • 1 orange, zested

    A-09-Carrot-bouquet-IMG_0986


    SIMPLE STEPS

    • Roast carrots (blend) and leeks (keep chunky)
      • Pre-heat oven to 400 degrees Fahrenheit.
      • Peel and cut carrots into 2” pieces.
      • Toss carrots in organic extra virgin olive oil and sea salt.
      • Place carrots on parchment-lined sheet plan
      • Roast for 15 minutes.
      • Flip carrots
      • Roast another 12-15 minutes


    • Cook Soup
      • Peel and slice shallot.
      • In large soup pot, sweat shallot with olive oil, coriander and caraway seeds for 5 minutes.
      • Add stock, salt, and carrots to the pot.
      • Bring to a boil.
      • Add the bouquet and lower to simmer.
      • Simmer for 30 minutes.
      • Season with orange juice and zest.
      • Blend until smooth.

    A-11-Carrot-soup-miseenplace-IMG_1002

    A-12-Carrot-sweat-shallot-IMG_1005

    A-13-carrot-soup-pot-IMG_1019

    The beautiful,  sweet roasted carrot soup. I’ll also blog the Braised Leeks recipe.

    A-soup-finalplate-portrait-IMG_E1656

    A-soup-close-up-side-IMG_1736If you enjoy Melanie Albert’s recipes and perspectives, purchase her book, “A New View of Healthy Eating

    Please share your veggie soup creations with us on Facebook: www.facebook.com/NewViewHealthyEating


  • A New View of Healthy Eating: Daily Healthy Recipes by Melanie Albert: Superfood Sweet Potato Brownie

    by Melanie A. Albert, intuitive cooking expert, author, speaker, Founder & CEO Experience Nutrition Group, LLC

    This week I had the wonderful opportunity to lead an amazing Cooking Challenge Team Building with Visit Phoenix. For dessert, I decided to prepare the Sweet Potato Brownie and jazz it up with a raw cacao sauce and goji berries. This dessert is full of so many healthy ingredients, the sweet potatoes, raw cacao, and Arizona Medjool dates. It’s plant-based, gluten-free, and dairy-free. And, it tastes great. Not too sweet. Chocolatey. Just right.

    A-13-VisitPhoenix-ExperienceNutrition-TeamBuliding-MelanieDessert-IMG_2119
    PHOTO CREDIT: www.facebook.com/cassiescouture

    Excerpt from my book, “A New View of Healthy Eating”

    Chocolate Sweet Potato Brownie

    Delicious vegan, gluten-free chocolate dessert made with a sweet root veggie, the sweet potato. This brownie is always a favorite at kids’ and adults’ cooking classes. It’s one of those desserts we can even eat for breakfast!

    SIMPLE INGREDIENTS

    • 2 medium to large sweet potatoes
    • 12 Medjool dates, pitted
    • ⅔ cup raw almonds, ground
    • ½ cup brown rice flour
    • 4 tbsp raw cacao
    • 3 tbsp maple sugar
    • Pinch sea salt

    a-sweetpotatobrownie-img_2018.jpg

    SIMPLE STEPS   

    • Pre-heat oven to 350 F.
    • Peel sweet potatoes, cut into chunks, and steam in a bamboo steamer for about 20 minutes until they become really soft.


    • Once sweet potatoes are soft and beginning to fall apart, remove from steamer.

    A-SweetPotatoBrownie-IMG_2035

    • Mix sweet potatoes and pitted dates into food processor and blend.

    A-SweetPotatoBrownie-IMG_2044

    Put remaining ingredients into a large bowl and stir to combine.

    a-sweetpotatobrownie-img_2025.jpg

    • Add sweet potato/date mixture to other ingredients and stir well.

    A-SweetPotatoBrownie-IMG_2059

    • Place mixture into 8-inch by 8-inch parchment-paper-lined baking dish.

    A-SweetPotatoBrownie-IMG_2062

    • Cook for about 20 minutes.
    • Test doneness by pushing a toothpick into the brownie. The brownie is ready when a toothpick comes out dry.
    • Allow baking dish to cool for about 10 minutes.

    A-SweetPotatoBrownie-IMG_2066

    • Remove the brownies from baking dish.
    • Cool for a few minutes and cut into squares.
    • Enjoy!

    I had so much fun plating this Sweet Potato Brownie for our guests at the Visit Phoenix Team Building Cooking Challenge. Add a swipe of raw cacao agave sauce, goji berries, and a few walnuts.


    A-14-VisitPhoenix-ExperienceNutrition-TeamBuilding-Dessert-close-IMG_2121
    PHOTO CREDIT: www.facebook.com/cassiescouture

    ACTION: Make a healthy chocolate dessert and share your creation with us on Facebook, www.facebook.com/NewViewHealthyEating

    For more amazing simple healthy recipes, you can buy Melanie’s Book, “A New View of Healthy Eating: Simple Intuitive Cooking with Real Whole Foods”


    A-15-VisitPhoenix-ExperienceNutrition-TeamBuilding-Dessert-many-MG_2122

    PHOTO CREDIT: www.facebook.com/cassiescouture


  • A New View of Healthy Eating: Daily Healthy Recipes by Melanie Albert: Arizona Farmers’ Market Avocado Salad with Mindful Plating

    by Melanie A. Albert, intuitive cooking expert, author, speaker, Founder & CEO Experience Nutrition Group, LLC

    On our chilly Arizona winter morning —imagine 60 degrees, grey skies, and a little drizzle — I shopped at the Old Town Scottsdale Farmers’ Market. The difference between our grey day and the vibrancy of our local Arizona winter produce inspired today’s Avocado Salad. Thanks Alexa for asking me to blog about this fresh salad.

    Arizona Winter Morning at the Old Town Scottsdale Farmers Market


    The Contrast: Vibrant Produce at the Old Town Scottsdale Farmers’ Market


    Avocado Farmers’ Market Salad Recipe and Plating Presentation

    The Avocado Farmers’ Market Salad was created very intuitively and inspired by a few of my favorites. The first inspiration was golden and chioggia beets harvested early yesterday morning at The Farm at South Mountain for our Visit Phoenix Team Building Cooking Challenge Event. Craving tomatoes today, so I purchased a few beautiful yellow and red from Abby Lee Farms, about 4 miles from my home. I’m loving microgreens this season; this salad features a beautiful Wellness Mix from Arizona Microgreens. I also intuitively reached for the Hatun Basil Olive Oil from my friend, Onur Mendeli. Finally, I added a few capers to add to the beauty of the dish.

    b-avocado-mise-img_2170.jpg

    Mise en Place: Get your ingredients all set for plating.

    b-avocado-mise-img_2178.jpg

    A glance at the plating process. When we plate, we mindful place our food onto the plate one-by-one and very mindful. It’s a lovely meditative process to create food art.


    Arizona Avocado Farmers’ Market Salad: Beautiful, healthy, and delicious!!!

    D-avocado-salad-final-plate-IMG_2197

    Action: Have fun intuitively choosing a few beautiful veggies, micro-greens, and olive and mindfully plate your own avocado salad. Post your beautiful creations on our Facebook page: www.facebook.com/NewViewHealthyEating

    Melanie’s book, “A New View of Healthy Eating” features 54 simple plant-based, whole foods recipes and 84 simple culinary techniques.

    A-IMG_5209

    Another look at the Arizona Avocado Farmers’ Market Salad

    c-avocado-plate-IMG_2192


  • A New View of Healthy Eating: Daily Healthy Recipes by Melanie Albert: Quick and Easy Tomato Gazpacho

    by Melanie A. Albert, intuitive cooking expert, author, speaker, Founder & CEO Experience Nutrition Group, LLC

    Today I had the opportunity to share how to make a really simple tomato gazpacho to a group with Gregory’s Fresh Market. Tomato gazpacho is one of the simple staples in my cooking classes, as it is so simple for everyone to make – from kids, to adults, to former NFL players and their families, to seniors.  This cold soup is also so refreshing and very versatile. Plus, it’s great for hydration.


    This soup is so quick to prepare. In fact, today, I chopped for 30 minutes and then prepared two big batches in 30 minutes for the 56 people attending the cooking class. During the classes, rather than blending the veggies, I actually massage the tomatoes to bring out the tomato juice and flavor. Today, we intuitively made one batch with lots of garlic and cilantro, and the other with a little more lemon and green onions.

    The recipe in my book, “A New View of Healthy Eating” can be used as a basic guide to prepare the soup, then you can experiment with different flavors. Such as lime, dill, lots of colorful heirloom tomatoes, various peppers.

    Excerpt from “A New View of Healthy Eating

    Summertime Tomato Gazpacho Cold Soup

    A fresh, cold tomato gazpacho is refreshing, especially on warm days. Make this quick cold tomato soup with red, orange, and yellow tomatoes and red, orange, yellow, and green bell peppers for a bright summer side dish. Be sure to try the beautiful (some may think ugly) heirloom tomatoes. If you are fortunate enough to purchase a whole flat of really ripe organic tomatoes, make a big batch of tomato gazpacho for a summertime picnic.

    P-078-Option-Content-02-T-TomatoesSoup-hand-DSCF9538

    Simple Ingredients: Soup

    • 10 medium tomatoes, cut into eighths
    • 4 red, orange, yellow, and/or green bell peppers, seeded and rough chopped
    • 3 cucumbers, rough chopped
    • 2 jalapeno or Anaheim peppers, seeded and rough chopped
    • ½ cup fresh cilantro, chopped
    • ½ cup fresh lime juice
    • 6-8 garlic cloves, minced
    • Up to 2 cups water, if needed
    • Sea salt and pepper, to taste

    Simple Ingredients: Topping

    • 4 tbsp cucumber, small diced
    • 4 tbsp tomato, small diced
    • 4 tsp cilantro leaves

    Simple Steps

    • Place all soup ingredients in a large bowl.
    • Mix well.
    • Puree half of the ingredients in a high-speed blender until smooth.
    • Combine pureed soup with chopped veggies.
    • Taste and season with sea salt and/or pepper.
    • Top with diced cucumbers, tomatoes, and cilantro.
    • Enjoy!
    • Refrigerate leftover gazpacho soup and enjoy the next day for an even more flavorful soup.

    P-080-tomatogazpacho-mandkind-B-IMG_4946

    P-081-A-gazpacho-IMG_0810

    ACTION: Make your own tomato gazpacho, experimenting with fresh herbs, peppers, and colorful tomatoes. Share your cold soup with us on Facebook.com/NewViewHealthyEating

    42-43_tomato-gazpacho_28June


  • A New View of Healthy Eating: Daily Healthy Recipes by Melanie Albert: Back to the Basics: Make Home-made Marmalade

    by Melanie A. Albert, intuitive cooking expert, author, speaker, Founder & CEO Experience Nutrition Group, LLC

    Honestly, this was only the second time in my life that I’ve ever made marmalade. A few weeks ago I made a beautiful Australian Blood Orange Marmalade which was so rich and vibrant, so I decided to make an Arizona citrus marmalade for the Chocolate Chickpea Crepe for my Final Project in the Plantlab Culinary Cooking Course.

    AA-bloodorangemarmalade-IMG_E4226

    This time, it’s January citrus season in Arizona, so I was fortunate to make the marmalade with local Arizona navel oranges, tangerines, and lemons, plus Arizona Spring Dessert Bloom Honey.

    a-IMG_9698

    For me, making the marmalade is a two-step process. I made the pectin last night, so it could cool in the refrigerator and I prepared the marmalade this morning.

    Arizona Citrus Marmalade

    • INGREDIENTS
      • 2 navel oranges
      • 2 tangerines
      • 1 lemons
      • ½ cup Arizona honey
      • ½ cup water
      • ¼ cup lemon navel orange pectin
      • 1 vanilla bean, split and seeds scraped
      • Pinch salt

    SIMPLE STEPS: Pectin and Marmalade

      • Prepare Citrus
        • Wash citrus (navel orange, tangerine, and lemon) thoroughly.
        • Navel orange for marmalade and pectin
          • Using a zester or vegetable peeler, carefully remove zest off navel orange, without any of the white pith. Sliver the zest for marmalade juice.
          • Slice navel orange into ¼” rounds., and slice in half. Remove the seeds and pith.
          • Save the orange rounds for the marmalade.
          • Save the seeds and pith for the pectin.


    • Tangerine for marmalade
      • Peel tangerine.
      • Slice tangerine into ¼” rounds. Remove seeds.
      • Save tangerine rounds for the marmalade.
    • Lemon for pectin
      • Cut lemon in half.
      • Squeeze juice for the marmalade.
      • Save the lemon skins and seeds for the pectin.

    • Lemon Orange Pectin
      • Ingredients
        • Lemon skins (without juice)
        • Navel orange pith (while) and seeds
        • Filtered water
      • Simple Steps
        • Place lemon skins (without juice), orange pith and seeds into small sauce pan.

    A-pectin-IMG_1761

    • Cover with water.
    • Bring to a boil over high heat.
    • Reduce heat to low and simmer, covered, for 10 minutes.
    • Remove from heat and rest in refrigerator until cool or overnight.
    • Once cool, strain lemon halves, orange pitch and seeds.
    • Reserve pectin (strained liquid) for marmalade.

    A-pectin-IMG_1777

    • Navel Orange Tangerine Marmalade
      • Ingredients
        • Navel oranges
        • Tangerines
        • Lemon juice
        • 1 vanilla bean, split and scraped seeds
        • Pinch sea salt

    B-marmalade-IMG_1769

    • Simple Steps
      • Place navel orange and tangerine rounds, navel orange zest, honey, water into small pot.
      • Mix well.
      • Bring to a simmer over medium heat for 10 minutes.
    •  Strain the liquid from the citrus. Save the citrus for traditional, thick marmalade.

    C-marmalade-IMG_1783

    • Pour ¼ cup pectin into a small pot.
    • Add citrus liquid, vanilla seeds, and salt.
    • Bring to a boil over high heat, stirring minimally for approximately 20 minutes, until syrup reaches gel stage (220 degrees Fahrenheit)
    • Stir in previously simmered navel and oranges to the syrup for a traditional marmalade.

    C-marmalade-IMG_1805

    Action: Make your own citrus marmalade and share your beautiful creations with us on our Facebook page, www.facebook.com/NewViewHealthyEating

    Interested in more healthy recipes, buy Melanie’s book, “A New View of Healthy Eating”.


    C-marmalade-IMG_1839

  • A New View of Healthy Eating: Daily Healthy Recipes by Melanie Albert: Arizona Winter Harvest Flatbread

    by Melanie A. Albert, intuitive cooking expert, author, speaker, Founder & CEO Experience Nutrition Group, LLC

    It’s been a full few days, having fun preparing my Final Project – Arizona Winter Harvest Menu  –  the Plantlab Culinary Cooking Course.  Today I’ll share step-by-step photos of layering ingredients onto the final flatbread and some plating options. One plating presentation features many edible flowers from a local Arizona farm about half mile from my home. Hope this flatbread inspires you to make your own beautiful flatbread with your local farmers beautiful veggies.

    Prep the Pizza Stone

    Once the dough is prepared and rolled out for the flatbread, it’s time to put it into the oven. Click here for the Blog to prepare the Sprouted Spelt Flatbread Dough.

    • Place pizza stone in oven.
    • Pre-head oven to 375 degrees Fahrenheit.
    • Warm pizza brick in the oven for about 15 minutes.
    • Carefully remove pizza stone from the oven.
    • After 15 minutes remove the pizza stone from the oven and increase temperature to 400 degrees.

    Cook the Flatbread and Add ingredients

    • Move the flatbread to the pre-heated pizza stone.
    • Lightly top the flatbread with organic extra virgin olive. The oil will make the bread a little crisp and the topping ingredients will not soak into the bread.

    B-Flatbread-IMG_0530

    • Bake the flatbread for about 5 to 7 minutes.
    • Remove from oven.

    B-flatbread-IMG_0532

    • Add your sauce to the flatbread. For this flatbread, I made a beautiful white almond bechamel sauce.

    B-flatbread-IMG_0534

    • Mindfully, add your favorite toppings. Today, I added roasted veggies: tomatoes, then red peppers, then Brussels sprouts, and finally golden beets and watermelon radishes.


    • Cook flatbread for another 5 minutes.
    • Remove from oven.
    • Add any extras. For this flatbread I topped with Pistachio Pesto.

    A-flatbread-wood-IMG_0643

    • Enjoy!

    a-flatbread-plate-top-img_0711.jpg

    In a future blog, I’ll share how I prepped the root veggies (beets, watermelon radishes) Brussels sprouts, and tomatoes.

    Another plating option with lots of editable flowers.

    A-flatbread-plate-triangle-top-IMG_0762

    ACTION: Have fun making your own flatbread, with local farmers veggies, and share your creations with us on Facebook: www.facebook.com/NewViewHealthyEating

    A New View of Healthy Eating” book is available. Melanie is happy to gift-wrap for you and your friends.

    IMG_6585

  • A New View of Healthy Eating: Daily Healthy Recipes by Melanie Albert: How to Make the Perfect Flatbread Everytime. Really!

    by Melanie A. Albert, intuitive cooking expert, author, speaker, Founder & CEO Experience Nutrition Group, LLC

    This weekend I’m cooking the Final Project for the Plantlab Culinary Cooking Course and will be sharing recipes and culinary techniques with you in my blog.  The menu for my project is inspired by our local Arizona farmers produce and our winter citrus season. The menu:

    Arizona Winter Harvest Menu

    • Roasted Carrot Soup. Orange Braised Leeks.
    • Sprouted Spelt Flatbread. Arizona Winter Roasted Veggies. Pistachio Pesto. Almond Bechamel Sauce
    • Sweet Chocolate Chickpea Crepe. Seared apples and pears. Arizona Citrus Marmalade.
    • Root Matcha Latte. Chicory and Dandelion Root Matcha Latte.Cashew Milk. Cinnamon. Cardamom. Nutmeg. Cloves.

    Sprouted Spelt Flatbread

    Today, I prepared the second course, the flatbread. It starts with a sprouted spelt flatbread. Over the last few years of culinary, I’ve learned some simple, important tips that I’ll share with you in the blog today.

    A-flatbread-plate-portrait-IMG_E0720


    FLATBREAD DOUGH

    INGREDIENTS

    B-flatbread-dough-IMG_0205

    • 4 cups sprouted spelt flour
    • 1.5 cups lukewarm water
    • 1 tbsp active dry yeast
    • 1 tsp sea salt
    • ½ tbsp honey
    • 1 tsp organic extra virgin olive oil

    SIMPLE STEPS

    Activate the Yeast

    • Pour warm water in a bowl. Check to be sure the temperature is 110-115 degrees Fahrenheit. The correct temperature is key to activating the yeast.

    B-flatbread-dough-IMG_0206

    • Add the yeast, honey, and olive to the water.
    • Mix with a wooden spoon to dissolve all ingredients. Do not use a stainless steel spoon or fork, which may negatively interact with the activation of the yeast.
    • Set aside to activate for about 20 minutes. The liquid will foam when activated.

    B-flatbread-dough-_0218


    Make the Dough

    • Place spelt flour in a large bowl.
    • Make a well with your hand in the flour and add the water with yeast.
    • Mix to combine ingredients with wooden spoon.
    • Gently knead for about 2 minutes.
    • Form dough into a ball.
    • Grease a bowl with olive oil and put the ball of dough into the bowl to rise in a warm place, covered with a towel, for about 2 hours.
    • Once the dough has risen, split into 2 balls, place back into the bowl and rise for another 2 hours.


    • Once the dough has risen this second time, place half of the dough onto a floured surface (I use parchment paper).
    • With your hands, form dough into desired size and shape.
    • Cover dough with another layer of parchment paper.
    • With a rolling pin, roll dough about ¼ inch thick, then make a small ridge around the edges to hold in sauce and ingredients.


    • Move flatbread to pre-heated pizza stone.

    B-flatbread-dough-IMG_0526

    I look forward to sharing the next steps with creating my beautiful and tasty Arizona Winter Veggie Flatbread.

    If you’re interested in additional recipes and culinary techniques and tips, my book, “A New View of Healthy Eating” is available!

    A-IMG_5209


  • A New View of Healthy Eating: Daily Healthy Recipes by Melanie Albert: Fresh Green Pistachio Pesto

    by Melanie A. Albert, intuitive cooking expert, author, speaker, Founder & CEO Experience Nutrition Group, LLC

    As some of you are aware I’ve been studying in a Cooking Course with Plantlab Culinary and am currently recipe testing for the Final Project. The Second Course for my Project is Sprouted Spelt Flatbread. One of the components of the flatbread is a fresh green pesto to add color, texture, and a sharp flavor to the flatbread.

    I invite you to use the Pistachio Pesto recipe as guide to intutively create your own pesto, with different nuts, such as walnuts or pecans, and different fresh herbs. Enjoy the pesto with flatbread, on a sweet potato, or even with a salad.

    Green Pistachio Pesto

    Ingredients

    • 2/3 cup pistachios, rough chopped
    • 1/2 cup fresh parsley, rough chopped
    • 1/2 cup spinach, roughly chopped
    • 1/3 cup extra virgin olive oil
    • 1/6 cup lemon juice
    • 1 garlic clove, minced
    • 1 tsp lemon zest

    Pistachio-Pesto-ExperienceNutrition

    Simple Steps

    Step 1: Gather your mise en place.

    a-pistachio-pesto-mise-en-place-img_0102.jpg

    Step 2: Spin parsley and spinach in salad spinner to dry the leaves.

    Step 3: Make your dressing with the olive oil, lemon, sea salt, and garlic. Start with 1 part acid (lemon), with 2 parts (olive oil), taste and balance with more oil or lemon. Add sea salt and minced garlic.

    A-pistachio-pesto-dressing-IMG_0112

    Step 4: Add the pistachios, parsley, spinach, and lemon zest to the dressing and toss.

    a-pistacho-pesto-img_0115.jpg

    Step 5: If you’d like the pesto more fine, pulse in a food processor for a minute or two.

    Tonight I enjoyed the pesto with an Arugula Tomato Avocado Salad, with local Arizona farmer’s organic arugula, pea shoots, and mini-tomatoes. Added a few of my favorites olives, capers, and goat cheese.

    A-pistachio-pesto-salad-IMG_0165

    Would love to see your pesto creations on our Facebook page: www.facebook.com/NewViewHealthyEating

    A-pesto-salad-IMG_0179

  • A New View of Healthy Eating: Daily Healthy Recipes by Melanie Albert: Drink Matcha Tea Today!

    by Melanie A. Albert, intuitive cooking expert, author, speaker, Founder & CEO Experience Nutrition Group, LLC

    This morning a friend of mine was asking about my motivational New View of Healthy Eating Card Deck. I let her know that the intention of the deck is to motivate us to take action on our eating, cooking, and self-care. It’s been awhile since I personally used my deck, so I intuitively choose a card for today. This “Drink Matcha Green Tea Today” is the inspiration for today’s blog.

    MatchaTea

    I’ve been drinking matcha tea since 2004. I was just beginning to work in marketing and branding with Dr. Andrew Weil’s organization and learned about matcha and starting drinking it. Honestly, at first matcha was a little bitter for me and it took some time to become accustomed to drinking it. Now, I love matcha and drink it almost every day and enjoy the mindful process of preparing and drinking the tea.

    M-matcha-mel-DSCF9591


    Excerpt from “A New View of Healthy Eating”

    Matcha: Tea of the Japanese tea ceremony

    • High quality Japanese green tea is covered before picking to accentuate its vibrant green color and to increase amino acids, as well as vitamins A and C.
    • The tea leaves are stone-ground, so we actually eat tea leaves when we drink matcha tea and receive the full benefits of green tea.
    • Intense grassy, green taste.

    P-435-M-matcha-DSCF9545-copy

    4 Simple Steps to Prepare Matcha Tea

    Step 1: Place ¼ tsp matcha in matcha bowl.

    Step 2: Add nearly boiled water.

    Step 3: Whisk with a bamboo whisk.

    P-438-M-matcha-DSCF9582-copy

    Step 4: Enjoy the ritual and ceremony.

    M-matcha-DSCF9588

    As a side note, my company created a beautiful matcha tea kit for the 2008 Super Bowl XLII in Phoenix. I have to say, I think we were a little ahead of the trends…

    P-439-M-matcha-DSCF9583-copy

    Action: Try some match tea today! Really!

    Hope you enjoy drinking matcha tea. Please share your experience with us on Facebook: www.facebook.com/NewViewHealthyEating

    186-187_experience-green-tea

  • A New View of Healthy Eating: Daily Healthy Recipes by Melanie Albert: Quick Lentil Quinoa Sweet Potato Soup

    by Melanie A. Albert, intuitive cooking expert, author, speaker, Founder & CEO Experience Nutrition Group, LLC

    A few days ago a friend asked me for some ideas to create plant-based protein meals. Interestingly, when I was teaching former NFL players how to cook, one of the first questions they asked me was: “Mel, will I have to stop eating meat?”. Well, I let them know that if they ate meat, they should eat clean meat. I also let the NFL guys know that there are some great sources of plant protein, including legumes (beans, lentils) and some whole grains, such as quinoa, which is a complete protein. Lentil quinoa soup is quick and easy, as both ingredients do not need to be pre-soaked.

    Today’s soup is one that I taught former Arizona Cardinal, John Bronson how to cook. Take a look at the photos in my book, “A New View of Healthy Eating,” of John enjoying learning how to make Lentil Quinoa Soup with lots of anti-inflammatory turmeric.


    94-95_lentil-soup_July

     LENTIL QUINOA SWEET POTATO SOUP RECIPE

    SIMPLE INGREDIENTS

    • 1 cup lentils
    • 3-4 carrots and/or sweet potatoes, chopped
    • 2-3 cloves garlic, minced
    • 1 onion or 5-6 green onions, minced
    • 3-4 celery stalks, chopped
    • 2 tbsp organic extra virgin olive oil
    • 5-inch strip of kombu seaweed, if desired
    • 1 cup brown rice or quinoa
    • 6-8 cups water
    • ½ tsp cumin seeds, hand-ground
    • 1 tsp black pepper
    • ½ bunch kale, torn or chopped into bite-size pieces

    Simple Steps to create your Lentil Quinoa Sweet Potato Soup

    • Step 1: Gather your mise en place.


    • Step 2: Heat large soup pot at medium-low, add onions and cumin seeds to pot, and sweat for 5 to 10 minutes.
    • Step 3: Add celery and carrots, and cook for about 5 minutes.
    • Step 4: Add garlic and cook for about 30 seconds.


    • Step 5: Add sweet potatoes to pot and cook for about 5 minutes.

    B-lentil-quinoa-soup-IMG_9767

    • Step 6: Add ground turmeric to the pot.

    B-lentil-quinoa-soup-IMG_9772

    • Step 7: Rinse lentils and quinoa and pour into pot.

    B-lentil-quinoa-soup-IMG_9775

    • Step 8: Add about 8 cups of water to the pot.
    • Step 9: Bring soup to a boil.
    • Step 10: Lower to simmer and cook covered for about 30-45 minutes.

    B-lentil-quinoa-soup-IMG_9784

    • Step 11: Enjoy. Today, I topped with fresh pea shoots for freshness.

    C-Lentil-Quinoa-soup-IMG_9799

    If you’re interested in additional simple recipes, “A New View of Healthy Eating” is available.

    C-lentil-quinoa-soup-IMG_9794

  • A New View of Healthy Eating: Daily Healthy Recipes by Melanie Albert: Get Creative with Avocado Salsa

    by Melanie A. Albert, intuitive cooking expert, author, speaker, Founder & CEO Experience Nutrition Group, LLC

    This week, I had the opportunity to lead a cooking class with Gregory’s Fresh Market in Phoenix, with the theme of good fats for heart health. One of my favorite ‘good fat’ dishes is a very simple avocado salsa. It’s so versatile. With a simple avocado, fresh lemon juice, and sea salt base, we can add all kinds of veggies and make a quick healthy lunch or snack.

    P-071-A-avocado-IMG_7985

    Excerpt from Melanie’s book, “A New View of Healthy Eating.”

    EXPERIENCE NUTRITION Signature Avocado Salsa

    Honestly, I had never eaten fresh avocados until a few years ago, and thought I didn’t like them. One of my brothers made a simple, fresh avocado salsa with his home-grown yellow pear tomatoes and fresh garlic. Since that day when I first experienced the deliciousness of creamy avocados, I loved them and have taught the simple avocado salsa recipe to hundreds of people, including kids, MDs, former NFL players, and holistic students at speaking engagements, workshops, and cooking classes.

    Teaching my then 6-year old niece, Meredith how to massage the avocado salsa. She’s now 12 years old and still making avocado salsa for a snack.

    P-076-AvocadoMeredithYoung

    Basic Avocado Salsa

    Have fun intuitively creating your own avocado salsa with the veggies available right in your own refrigerator.

    This simple-to-make avocado salsa (or guacamole) is the best. Make it for lunch, as a snack, or for tailgating parties. It’s so easy to prepare and it’s so delicious that you’ll want to eat it a few times a week. With good monounsaturated fats, fresh veggies, and a squeeze of lemon, enjoy your avocado salsa with your favorite crunchy fresh organic raw veggies.

    Simple Ingredients

    • 4 soft, ripe avocados
    • 2-3 heirloom tomatoes or 6-8 cherry tomatoes
    • 3-5 green onions
    • Handful fresh cilantro or basil
    • 2-3 cloves raw garlic, minced
    • Fresh squeezed lemon juice, to taste
    • Sea salt to taste

    Simple Steps

    • Chop and gently mix all ingredients.
    • Enjoy as a salad or in a wrap.

     “Keep an avocado in your kitchen all the time so you’re always ready to make a quick avocado salsa to enjoy as a salad or in a wrap.” – Melanie Albert

    Create Your Own Avocado Salsa

    Using the Basic Avocado Salsa Recipe as a guide, create your own with your favorite farmers’ market fresh vegetables. Experiment with carrots (orange, yellow, or purple), peppers (red, green, yellow, or purple), cucumbers (green, lemon cucumbers, or Armenian), olives, garbanzo beans, and dehydrated tomatoes.

    7 Simple Ways to Enjoy Avocados

    1. Homemade avocado salsa
    2. Fresh avocado wrap
    3. In sandwiches instead of butter or mayonnaise
    4. Sliced and added to salad
    5. With steamed vegetables
    6. In raw vegan desserts
    7. With fresh lemon or lime juice, a little sea salt, and minced garlic as a simple snack

    ACTION: I invite you to buy a few avocados and have fun adding different veggies to your ‘avocado salsa”.

    Amazing. Take a look a the avocado tree In Cocoa Beach that my parents grew from seed…

    P-075-06-A-avocado-close-DSCF4363

    IMG_9691

  • A New View of Healthy Eating: Daily Healthy Recipes by Melanie Albert: How to get Started with Intuitive Cooking and 2018 Week 1 Recipes

    by Melanie A. Albert, intuitive cooking expert, author, speaker, Founder & CEO Experience Nutrition Group, LLC

    Today has been a full day of fun focusing on recipe creating and testing for the Final Project of the Plantlab Culinary Cooking course I’m currently taking . While working today I was intuitively creating my recipe directions, so I decided to share with you the concept of intuitive cooking and how to easily get started to shop and cook intuitively.

    Excerpt from “A New View of Healthy Eating”:  Cook with Intuition.

    With intuitive cooking, we use recipes as guides. We first learn simple, basic culinary methods and techniques (such as raw, steaming, or roasting) to prepare real whole foods with recipes as our guide. Naturally, over time, we learn to trust our own intuition to cook foods we desire using cooking techniques we’ve learned. Over time, you will not need to rely on recipes; you’ll trust yourself and your culinary skills to create your own healthy dishes with local, seasonal food.

    For instance, we learn the culinary technique to steam carrots in a bamboo steamer and use our recipe to finish the carrots with walnut oil, toasted cumin seeds, fresh lemon juice, parsley, and a pinch of sea salt. After learning the bamboo steamer technique to quickly steam veggies, we cook other steamed vegetables (such as asparagus, broccoli, cauliflower, and peapods) and finish them with different oils, spices, and fresh herbs.

    “With intuitive cooking we also naturally cook more mindfully, meditatively enjoying the rhythm of chopping veggies or the mindfulness of massaging kale or grating fresh spices.” – Melanie Albert

    4 Steps to Get Started with Intuitive Cooking

    • Step 1: Shop at a farmers’ market without a shopping list and purchase a few different veggies and fruit the local farmers’ in your area are growing. Intuitively choose foods that are beautiful to you.
    • Step 2: When you get home intuitively reflect on how you’d like to cook the veggies. Will you prepare a simple saute, a salad, or roasted veggies? Just use your intuition. Is it is warm outside and you’d like a cooling salad? Or, is it is chilly outside and you’d like warming roasted veggies or soup?
    • Step 3: Get your mise en place set. Chop your veggies. Get all your other ingredients, such as olive oil and sea salt ready. Gather the kitchen tools your need to cook: saute pan, flat cooking sheet, parchment paper.
    • Step 4: Enjoy intuitive cooking and mindfully eating your dish.

    P-008-AA-Philosophies-spread-csa-food-table-w9IMG_7631


    2018 Week 1 Healthy Recipes

    Now, let’s take a look at the healthy recipes this first week of 2018. Hope these recipes and culinary techniques give your ideas to cook a few healthy meals with real whole foods.

    Come on over to Facebook, www.facebook.com/NewViewHealthyEating and share your intuitive culinary creations with us.

  • A New View of Healthy Eating: Daily Healthy Recipes by Melanie Albert: Arizona Winter Salad: Arugula and Avocado

    by Melanie A. Albert, intuitive cooking expert, author, speaker, Founder & CEO Experience Nutrition Group, LLC

    It’s fun to intuitively create a quick salad with an avocado base and a few farmers’ market goodies. Today’s Arizona Winter Salad features a few of my very favorite goodies from our local Arizona farmers, including incredible carrots and arugula. Plus, an avocado, which adds to the richness of the salad with its good healthy fats. And, I included a whole grain, with left-over brown rice in the refrigerator.

    Thanks to Turkish Fair Trade Imports, LLC for the great Turkish Basil Extra Virgin Olive oil and to the Uptown Farmers’ Market and Arizona farmers – Steadfast Farms for the incredible carrots, and McClendon Select for the fresh arugula.


    Steps to Create a Quick Winter Salad

    Step 1: Choose a few organic produce. Plus, an olive oil, whole grain, and fresh herb.

    A-winterAZsalad-IMG_8861

    Step 2: Get your mise en place – everything into place – with veggies chopped and mindfully organized.

    a-winterazsalad-img_8868.jpg

    Step 3: Decide which ingredients to pair together for the salad. Today’s pairings: Arugula, tomatoes, sea salt, brown rice, and basil olive oil. Avocado pairing: the avocado, carrots, tomatoes, and fresh Arizona lemon. When you are pairing your ingredients, have fun and use your intutition. There are no right or wrong pairs.

    A-winterAZsalad-IMG_8870

    Step 4: Toss the arugula ingredients to coat the leaves with olive oil, lemon, and sea salt.

    Step 5: Gently mix the avocado ingredients and press into a ring mold.

    Step 6: Plate and enjoy! I had fun playing a little with the sweet carrots!

    A-winterAZSalad-IMG_8918

    A-winterAzsalad-IMG_8920

    If you are looking for more simple culinary skills, recipes, and ideas to cook intuitively, check out my book, “A New View of Healthy Eating.”

    A-IMG_5209

  • A New View of Healthy Eating: Daily Healthy Recipes by Melanie Albert: Really Quick Veggie Sauté

    by Melanie A. Albert, intuitive cooking expert, author, speaker, Founder & CEO Experience Nutrition Group, LLC

    When our days are full and we don’t have a lot of time to cook, a veggie sauté is a great option for a quickly prepared dinner. Today’s veggie sauté was inspired by several of my purchases from our local Arizona farmers’, including sweet potatoes, I’itoi onions, and arugula. To these veggies, I added a tomato, green pepper, and a few of my favorites, the olives, capers, and sun-dried tomatoes. The quick sauté was a beautiful combination of warming, sweet and earthy.


    Simple Steps to make a Quick Veggie Sauté

    Step 1: Choose a few veggies.  An aromatic onion. Some veggies with more moisture (like tomatoes and bell peppers) and some more dense root veggies, such as sweet potatoes, carrots, or beets. And, some light greens such as arugula or spinach.

    a-experiencenutrition_veggiesaute-img_8808.jpg

    Step 2: Chop veggies in different shapes for visual interest in your dish.

    a-experiencenutriton-veggiesaute-img_8809.jpg

    Step 3: Heat sauté pan at low heat. When the pan is warm, add a few tablespoons of organic extra virgin olive oil. Yes, when we use a high quality olive oil, with low acid level, below .7%, we can cook with it.

    Step 4: Add onions to the pan and gently sweat for about 5 minutes, until the onions are translucent.

    Step 5: Add bell pepper, increase heat to medium, and cook for a few minutes to release the flavors.

    Step 6: Add tomatoes and cook for another few minutes, to build the flavor base for the sauté. Add in a few pinches of sea salt to bring out the sweetness of the tomato.

    Step 7: Add sweet potatoes. Cook for another few minutes until the sweet potatoes are soft.


    Step 8: Add extras such as sun-dried tomatoes (re-hydrated in a simmering pot of water for a few minutes), olives, and capers.

    Step 9: Add a handful of arugula, gently toss, and cook for a minute or two.


    Step 10: Plate the veggies and enjoy.

    A-ExperienceNutrition-veggieSaute-IMG_8844


    Quote from “A New View of Healthy Eating”

    “Have fun preparing quick, delicious veggie stir-fries with a few simple steps. The key is to be organized. Pre-chop all your ingredients and set up your mise en place (all ingredients in place) for your cooking before you start stir-frying.” Melanie Albert


    Culinary Tip from “A New View of Healthy Eating”: What’s the Difference: Sauté vs. Stir-fry

    Sautéing and stir-frying are similar dry-heat cooking methods to cook food quickly. Small, bite-size pieces of food are stirred or tossed and quickly cooked over high heat. With sautéing, usually a pan or skillet is used; with a stir-fry, traditionally a wok is used.  With stir-frying, the heat is higher and the action is faster with the food continuously tossed and stirred.


    ACTION: Have fun shopping at your local farmers’ market and create a quick, simple, delicious veggie sauté and share your creation with us on Facebook: www.facebook.com/NewViewHealthyEating

    A few Veggie Sauté ideas from book, “A New View of Healthy Eating”

    80-81_sir-fry-photos

    78-79_simple-stir-fry_18July

    Interested in more healthy recipes, culinary techniques, and nutrition tips, purchase “A New View of Healthy Eating” today!


    IMG_6585


  • A New View of Healthy Eating: Daily Healthy Recipes by Melanie Albert: Salad Inspired by Arizona Farmer’s 3 Pound Lettuce

    by Melanie A. Albert, intuitive cooking expert, author, speaker, Founder & CEO Experience Nutrition Group, LLC

    I was so excited at the Uptown Farmers’ Market in Phoenix this week to see huge lettuce grown by Tom at Latchkey Gardens. The lettuce was so heavy, I asked Tom to weight it…it was an amazing 3 ¼ pounds.

    Today’s intuitive salad features this lettuce, local Arizona farmer’s produce, and offers you some culinary ideas to create your own unique salad. Take a look at the techniques used to create this fresh farmers’ market salad and choose one or two add to your own salad creations.


    • Step 1: Get organized with a few of your favorite fresh veggies. Today I’m excited to make this salad with local Arizona farmers’ produce including a tangerine (thanks Community Exchange), carrots (thanks Steadfast Farms), tomatoes (thanks Tiger Mountain Foundation), along with asparagus, avocado, walnuts, and my favorite olives and capers.

    a-img_8621.jpg

    • Step 2: Make the 3-Ingredient Salad Dressing. Start with an acid, add twice as much fat, and a little sea salt to create the base for your dressing. Today’s acid is a tangerine and the fat is organic extra virgin olive oil. I added fresh thyme for extra flavor. Experiment with other fresh herbs and/or minced garlic.
    • Step 3: Peel a few carrots. Place carrots in a bowl with ice and water to curl.
    • Step 4: Add a quick steam / sautéed veggie. Try a quick steam and saute a veggie, such as asparagus. Place the veggie in a small pan with a little water on medium heat. Onc water has cooked the veggie, add about a tablespoon of olive oil to saute.

    A-IMG_8666

    • Step 5: Add broiled avocado. Quick broil avocado with a little olive oil and sea salt.

    A-IMG_8669

    • Step 6: Tear the lettuce into bitesize pieces and place in a large bowl. Gently toss and coat the lettuce with the salad dressing.
    • Step 7: Add other ingredients to the lettuce to create your salad. Be creative using your local farmers produce. Today’s salad features carrots, tomatoes, asparagus, avocado, walnuts, olives, and capers.

    A-IMG_8685

    • Step 8: Mindfully plate your salad and enjoy.

    Action: Have fun creating your own lettuce salad using a new culinary technique. Share photos of your salads with us on Facebook: www.facebook.com/NewViewHealthyEating

    Melanie’s book, “A New View of Healthy Eating: Simple Intuitive Cooking with Real Whole Foods” features 54 simple plant-based recipes, 3 wild salmon recipes, and 84 simple culinary techniques.

    IMG_2592


  • A New View of Healthy Eating: Daily Healthy Recipes by Melanie Albert: Simple Steps to Quick Pickle Veggies

    by Melanie A. Albert, intuitive cooking expert, author, speaker, Founder & CEO Experience Nutrition Group, LLC

    Today was a full day of menu and recipe visioning and farmers’ market shopping for the Plantlab Culinary Cooking Course Final Project. As a result, I did not have a lot of time for cooking and ate left-over roasted veggies and hummus for dinner. With only a little time to share a recipe with you today, I decided to make a very quick pickle to share with you.

    Pickling is basically a way to preserve food by fermentation with with acid (vinegar), salt, and a sweetener. Today’s pickle features fennel bulb, apple cider vinegar, sea salt, agave, black peppercorns, plus an orange and fresh thyme.

    A-pickle-IMG_8585

    Simple Ingredients

    • 2 cups sliced veggies, such as cabbage, cucumbers, carrots, or fennel, green beans, beets, Brussels sprouts.
    • 1 citrus fruit, such as orange or lemon
    • Few sprigs fresh herbs, such as thyme, dill
    • 2-3 tbsp sea salt
    • ½ cup vinegar (apple cider vinegar, white wine vinegar, rice vinegar)
    • ¼ cup sweetener (agave, honey, maple sugar, coconut sugar, palm sugar)
    • ½ cup water, as needed
    • Extras: ½ tsp dried spices such as coriander, fennel seeds, caraway seeds, dill seeds, mustard seeds

    A-pickle-IMG_8583

    The Simple Steps to Prepare Your Pickled Veggies

    Step 1: Choose a veggie, such as fennel, cabbage, carrots, or cucumbers, beets, green beans, or Brussels sprouts.

    Step 2: Thinly slice the veggies with a knife or mandoline. If you use a mandoline to thinly slice the veggies, they will absorb the vinegar mixture more and become more sour.

    Step 3: Massage the veggies, citrus with the salt, pepper, and fresh herbs in a large bowl.

    A-pickle-IMG_8592

    Step 4: Whisk the vinegar and sweetener in a small bowl.

    Step 5: Place the massaged veggies into a quart sterilized Mason Jar.

    Step 6: Pour the vinegar and sweetener mixture into the jar to cover the veggies.

    A-pickle-IMG_8597

    Step 7: Add enough water to fully cover the veggies, leaving about 1” space at top of jar.

    A-pickle-IMG_8603

    Step 8: Cover the top of the veggies with a lettuce or cabbage leaf to make sure all veggies stay submerged in the liquid to prevent bacteria growth.

    A-pickle-IMG_8609

    Step 9: Store the jar at room temperature, out of direct sunlight for 5-7 days to allow for fermentation.

    Step 10: After 5-7 days, taste the pickled veggies.  When you like the level of sourness, store in your refrigerator for about 2 weeks.

    Step 11: Enjoy your pickled veggies with a slice of avocado or nut cheese.


    ACTION: Have fun experimenting with quick pickling with veggies from your farmers’ market and with different spices.

    For more simple recipes, culinary and nutrition tips, I’m happy to mail a copy of my book,  “A New View of Healthy Eating,” to you or your friends.

    IMG_6585

  • A New View of Healthy Eating: Daily Healthy Recipes by Melanie Albert: How to Roast Beautiful Veggies: Romanesco and Sweet Potatoes

    A New View of Healthy Eating: Daily Healthy Recipes by Melanie Albert: How to Roast Beautiful Veggies: Romanesco and Sweet Potatoes

    by Melanie A. Albert, intuitive cooking expert, author, speaker, Founder & CEO Experience Nutrition Group, LLC

    Roasting veggies is such a simple culinary technique that I taught my 88- and 91-year old Mom and Dad how to prepare them while in Cocoa Beach during the Christmas 2017 holiday. The key is to choose a few of your favorite veggies, add some organic extra virgin olive, oil, and sea salt or a mix of dried herbs. I was so excited to purchase a Romanesco cauliflower, a beautiful blend of cauliflower and broccoli and local Arizona farmers’ sweet potatoes for today’s roasted veggies.


    Simple Steps to Roast Romanesco and Sweet Potatoes

    Inspired by the beautiful Romanesco!

    A-romanesco-IMG_8282


    Step 1: Get set with your mise en place – all ingredients in place: Romanesco, sweet potato, organic extra virgin olive oil, and sea salt.


    Step 2: Steam Romanesco. Prior to roasting, steam chopped romanesco in bamboo steamer for about 5 minutes. The romanesco is ready when fork easily slides into the veggie.


    Step 3:  Gently toss sweet potato and romanesco with organic extra virgin olive oil and pinch of sea salt.

    A-romanesco-IMG_8332


    Step 4: Mindfully place veggies on a sheet pan. Be sure the veggies do not touch, to prevent them from steaming.

    A-romanesco-IMG_8346


    Step 5: Roast veggies in 400 degree oven for 15 minutes. Flip and roast another 8-12 minutes. Sweet potatoes will be crisp on outsie and soft inside.

    A-romanesco-IMG_8376


    Step 6: Get set for plating. Today, I added home-made hummus, olives, and capers to the roasted romanesco and sweet potatoes.

    a-romanesco-img_8378.jpg


    Step 7: Have fun mindfully plating your veggies. Be intuitive and remember, we eat with our eyes first.

    a-romanesco-img_8404.jpg


    Step 8: Mindfully enjoy your meal!

    A-romanesco-IMG_8408


    YOUR ACTION: Choose a few of your favorite veggies, roast and plate them. Enjoy. And, share your culinary creation with us on Facebook: www.facebook.com/NewViewHealthyEating